Curved MPR (CMPR) View

Curved MPR, a variation of MPR, creates cross-sectional images along a user-drawn curved path. CMPR can be especially useful when visualizing complex or irregular structures, such as blood vessels or various spinal structures.
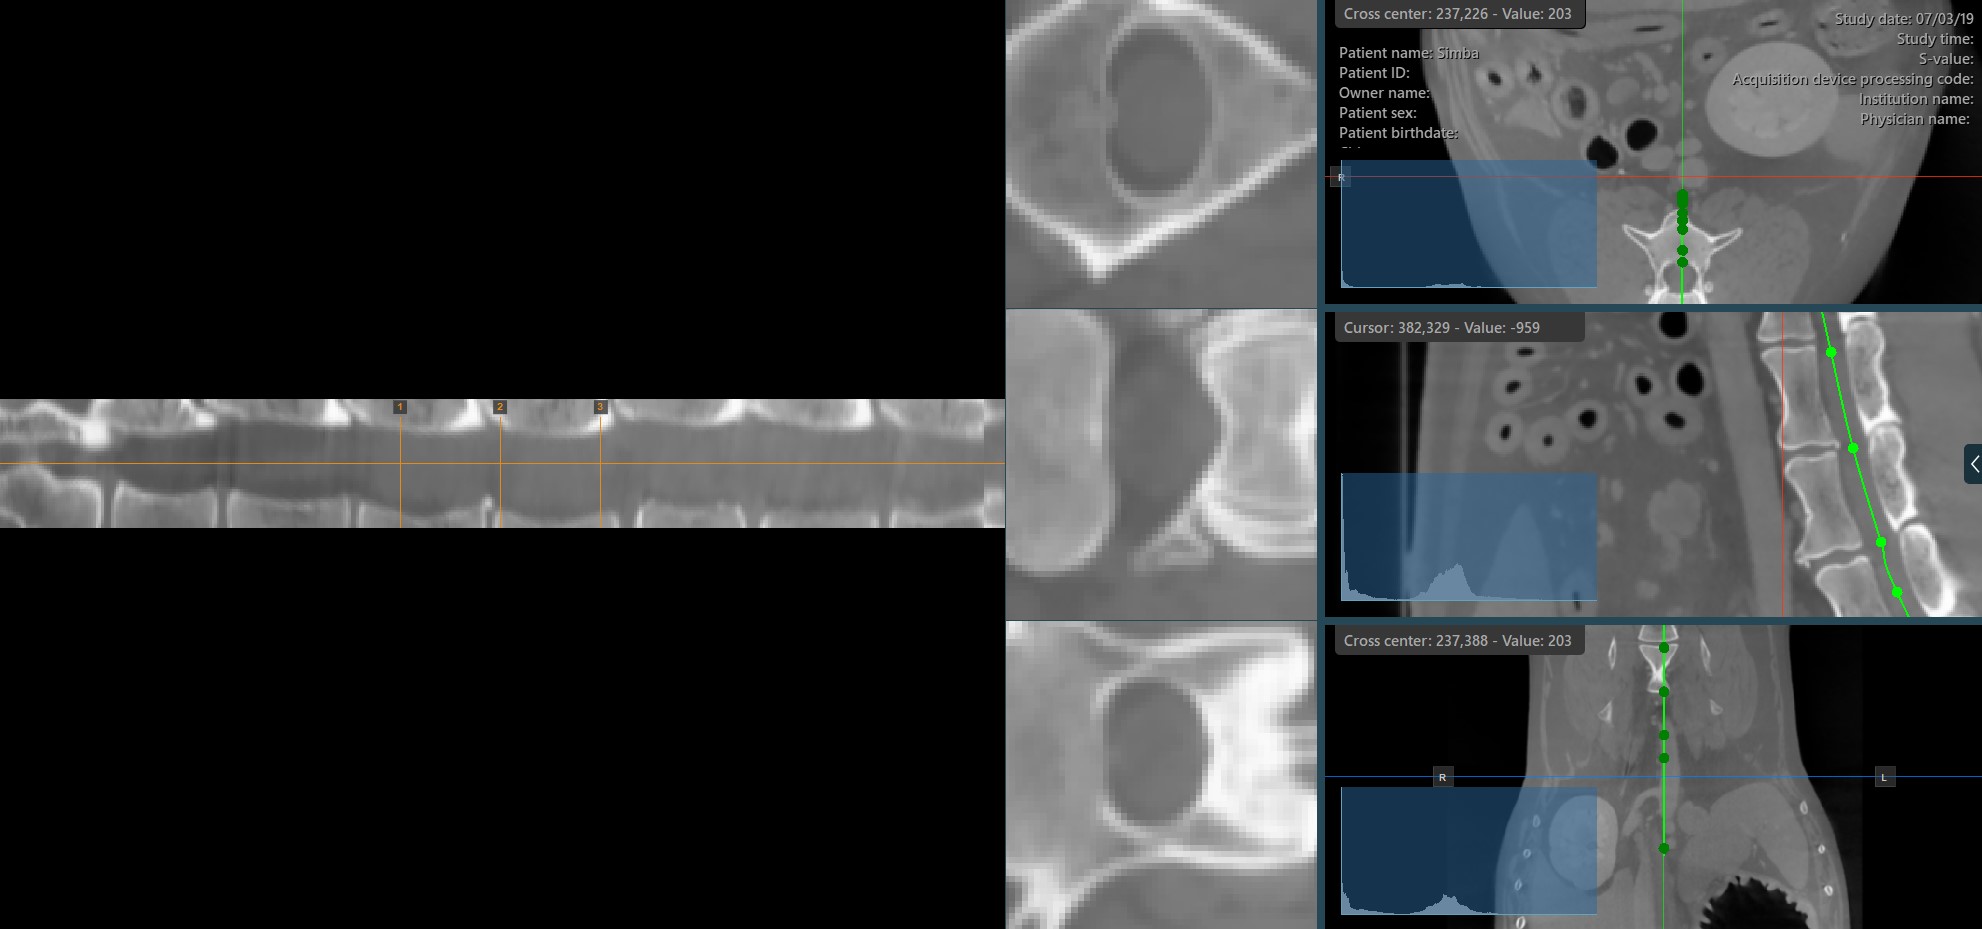
The curved MPR straightened view, along with its associated slicers are located on the left side of the viewer, while the standard MPR in all three available planes is located on the right side of the window.
Add Curved Path Points

The Curved MPR requires a user-drawn path in order to generate the cross-sectional images. Select the Add CMPR Point tool located at the bottom section of the CMPR view to draw the required path.
The points generating the path have to be placed on one of the three available standard MPR viewports on the right side of the window. Choose the most appropriate plane for the requirements.
At least two points have to be placed on the images in order to generate the path. The CMPR view will be more detailed when more points are used to draw the path.

To complete the path, toggle the
Add CMPR Pointtool again, or double-click with the mouse on the image after placing the last point of the path. The path will be marked in green once it’s finalized.
Hovering over the straightened view of the CMPR path will display an orange dot on the path drawn on the MPR images, highlighting the precise location of the cursor.
Similar to the regular MPR view, the measurement tools available in the CT Viewer can also be used on the three available CMPR slicer viewports.
Modify the CMPR path by selecting the Select/Move Item tool and assigning one of the available mouse buttons to it. Press and drag one of the base points of the path to modify its position.
Delete CMPR Path

Use the Delete CMPR Path tool located in the bottom section of the CMPR view to delete the CMPR path drawn on the images.
Other CMPR Parameters
In addition to the options to create and delete CMPR paths, the CT Viewer offers additional parameters for better configuration of the CMPR view.
Adjust the angle and rotate the axis of the CMPR views by dragging the slider in the appropriate direction. Press the
Reseticon in the middle to reset the angle.Modify the position of the slicers by dragging the slider in the appropriate direction.
Adjust the distance between the slicers by using the
Slicing Widthslider.Change the height of the slicers and the view to show a bigger portion of the CMPR view.

Load and Save CMPR Path
The CMPR paths drawn on the images can be saved and loaded for future use, vastly enhancing and optimizing the user experience.
Load a previously saved CMPR path by using the File -> Load CMPR Path option from the viewer menu. The CMPR view will be automatically displayed when using this option.
Save a drawn CMPR path by selecting the File -> Save CMPR Path option from the viewer menu. The user will be prompted to select the location and name of the file in the Windows file system.

