Windowing (Brightness and Contrast)

To change the window width and window center values of an image in the MPR view, select the Windowing tool from the left toolbar. This tool can be assigned to a specific mouse button. By default, the left mouse button is assigned
to this tool.
Once the tool has been selected, to change the window width and window center values press and hold the image with the assigned mouse button and start dragging the mouse in one of the four directions. To simultaneously update the brightness and contrast of the image, drag the mouse diagonally across the image.
Drag right to decrease the brightness (higher window center value)
Drag left to increase the brightness (lower window center value)
Drag up to decrease the contrast (higher window width value)
Drag down to increase the contrast (lower window width value)
There are two different windowing modes available in the CT Viewer, Default and Dynamic. Change the active windowing mode by using the menu when selecting the Windowing tool.

Default Windowing
The default windowing mode is active by default when the CT Viewer is opened. The window center and window width values are calculated based on the information in the DICOM metadata of the file.
Users can manually change the windowing settings by dragging the MPR WW and MPR WL sliders to the desired direction, or use the subsequent input fields to enter the specific values directly from the windowing section when the default
mode is active.
Additionally, choose one of the available windowing presets from the dropdown to directly apply the corresponding window center and window width values.

The windowing presets are also available from the windowing menu when the default windowing mode is active.

Dynamic Windowing
When the dynamic windowing mode is active, the window center and window width values are calculated based on the minimum and maximum available pixel values in the image.
The preset values for the dynamic windowing mode are represented as a percentage of the maximum determined windowing range. All of the preset values are available in the windowing menu when dynamic mode is active.

Alternatively, the percentage value of the maximum determined windowing range can be adjusted by using the Dynamic slider or the subsequent input field available in the windowing section when the dynamic mode is active.

Histogram
A windowing histogram is a graphical representation of the distribution of intensity values in an image. It displays the number of pixels at each intensity level, allowing users to adjust the brightness and contrast by setting a window around a range of intensity levels. By adjusting the position and width of the window, the user can optimize the image for their specific needs and better visualize the image features.
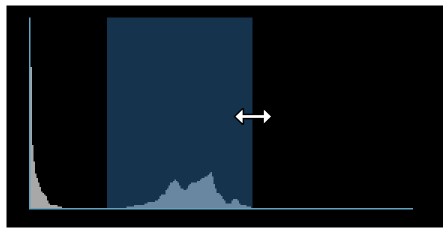
To change the window width, press and drag the left or right edge of the rectangular area representing the window.
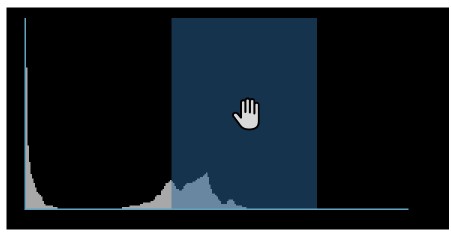
To change the position or the window center, press and hold on the rectangular area and drag in the desired direction.

To enlarge the visualized distribution of intensity values move the cursor over the horizontal axis of the histogram, then press and drag up to scale up or drag down to scale down the histogram.

Toggle the visibility of the histogram by using either the Hide Histogram or Show Histogram options from the windowing menu, or use the F12 keyboard shortcut.
Invert Image
The process of inverting the dark pixels into light pixels and vice versa in an image based on the DICOM standard is called inverting the polarity of the image.


Toggle the polarity of the image by using the Invert option from the windowing menu, or use the F11 keyboard shortcut.
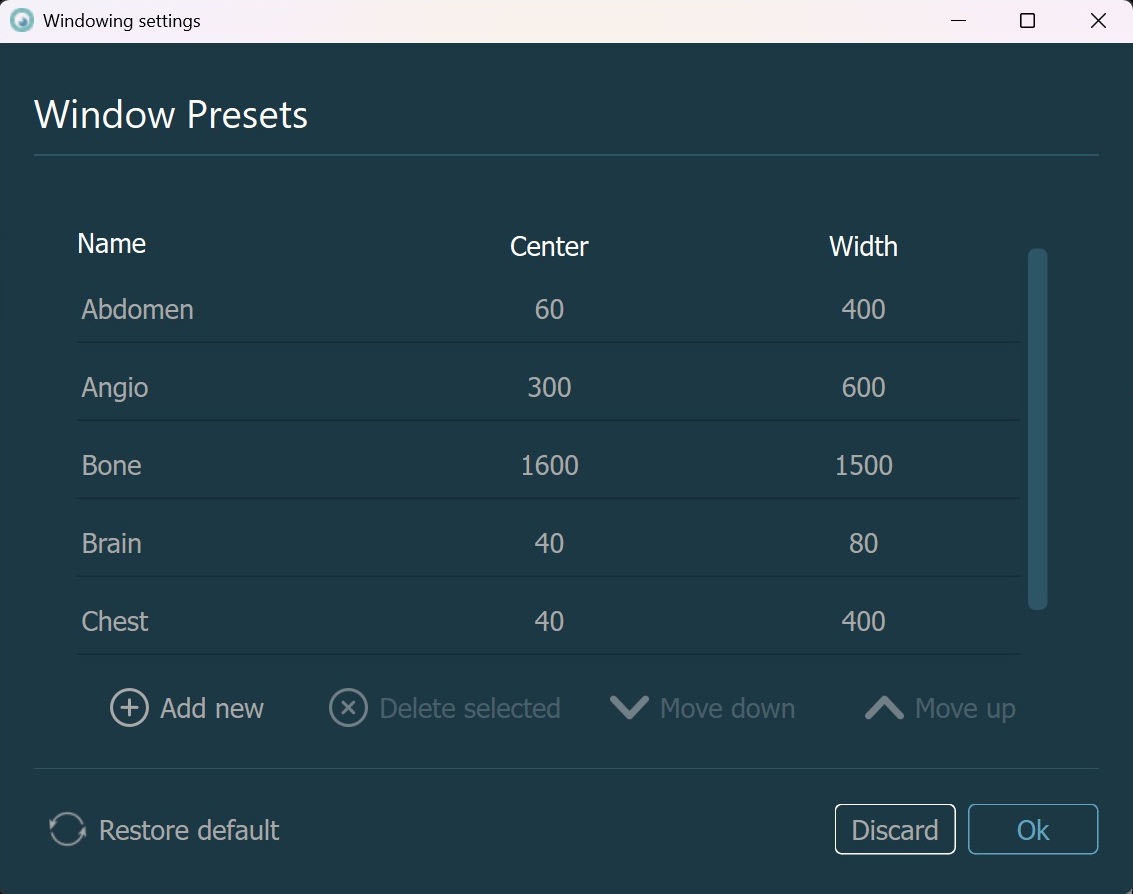
Windowing Settings
The windowing presets can also be modified directly by the CT Viewer. To open the windowing preset settings, select the Settings option from the windowing menu.

Confirm the changes to the windowing presets by pressing the OK button, or discard any changes by pressing the Discard button. Press Restore Default to restore the default windowing presets. The changes to the windowing presets
will update the settings of the software as well.
Modify an existing preset by double-clicking on the corresponding field, marking it as editable. Specify the new value and press
Enteror click outside of the field to finalize the modification.To add a new preset, press the
Add newbutton, which will add a new entry into the preset list. Follow the steps from the modify section to update the newly added preset.To delete a preset, select it from the list and press the
Delete selectedbutton.Reorder presets by selecting them for the list and pressing on one of the
Move uporMove downarrows. This changes the order in which the presets appear when you open them in the viewers.