Populate DICOM Servers
Upload DICOM Files

Select the desired DICOM server from the Study Browser toolbar. To upload new DICOM files to the selected server, press the Import icon in the Study Browser toolbar.
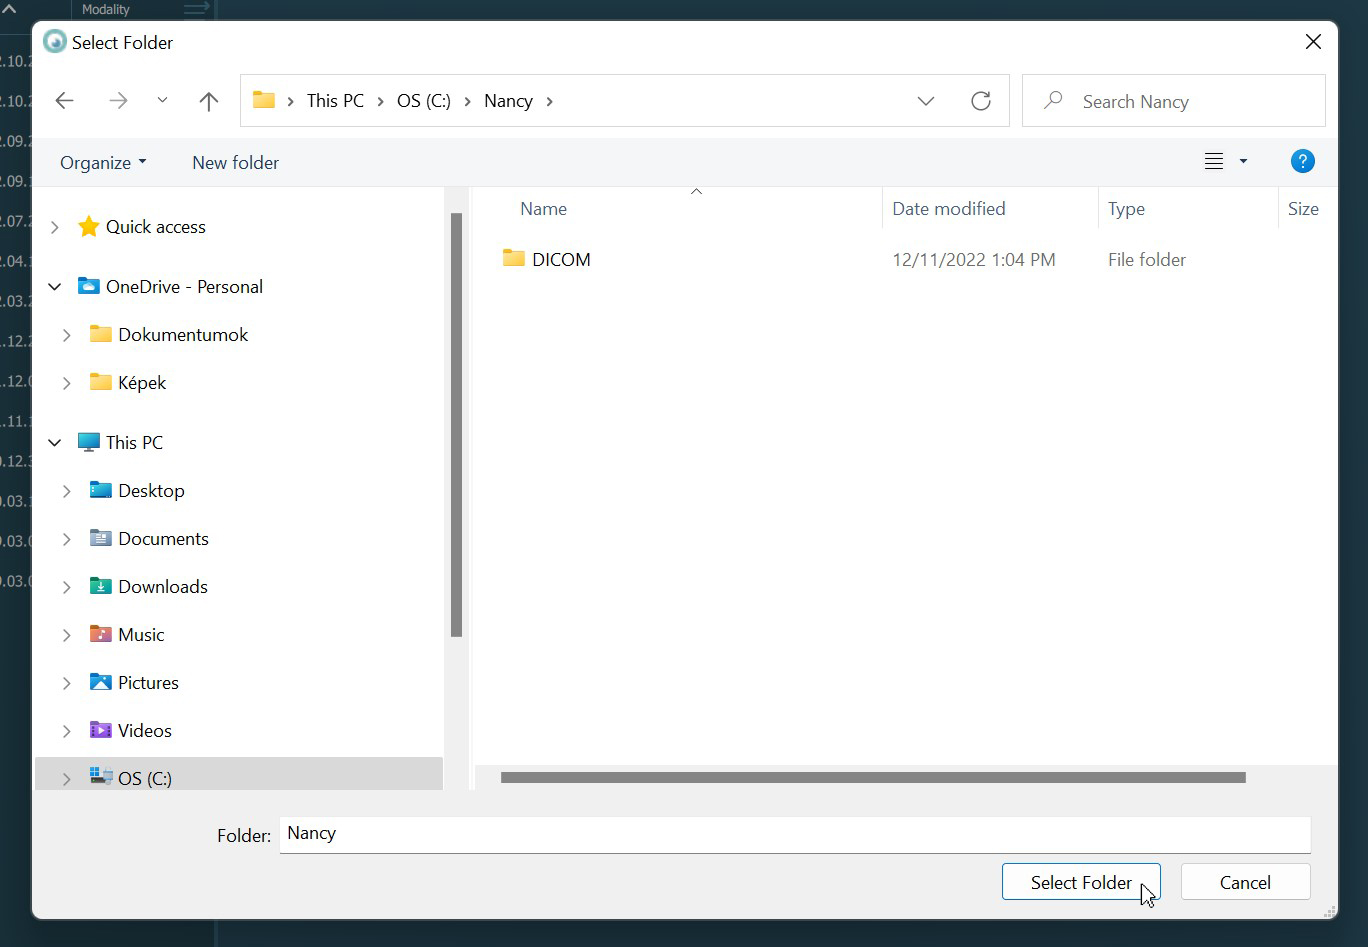
The VisioVIEW software opens the system’s file browser, where users can easily navigate to the folder containing your DICOM files. Once the correct folder is chosen, press Select Folder.
Note that this option selects directories only, so all the content of the selected folder and subfolders will be imported as well.
The upload process is started as soon as the folder is chosen. The VisioVIEW displays a status window, tracking the progress of each DICOM file being uploaded. To discard the ongoing process, press the Discard button. To close the window
once the process is complete, press the OK button.
Selecting a large amount of files may make the uplaod process take longer to complete. To continue using the software uninterrupted, select the Upload in background option for the ongoing process. The progress can still be tracked from the
information bar at the bottom of the Study Browser.

Import Images and Convert them to DICOM

Users can also import simple images (JPEG, PNG, BMP) to the selected server by converting them to DICOM files. To import images to the selected server, press the Convert Images to DICOM icon in the Study Browser toolbar.
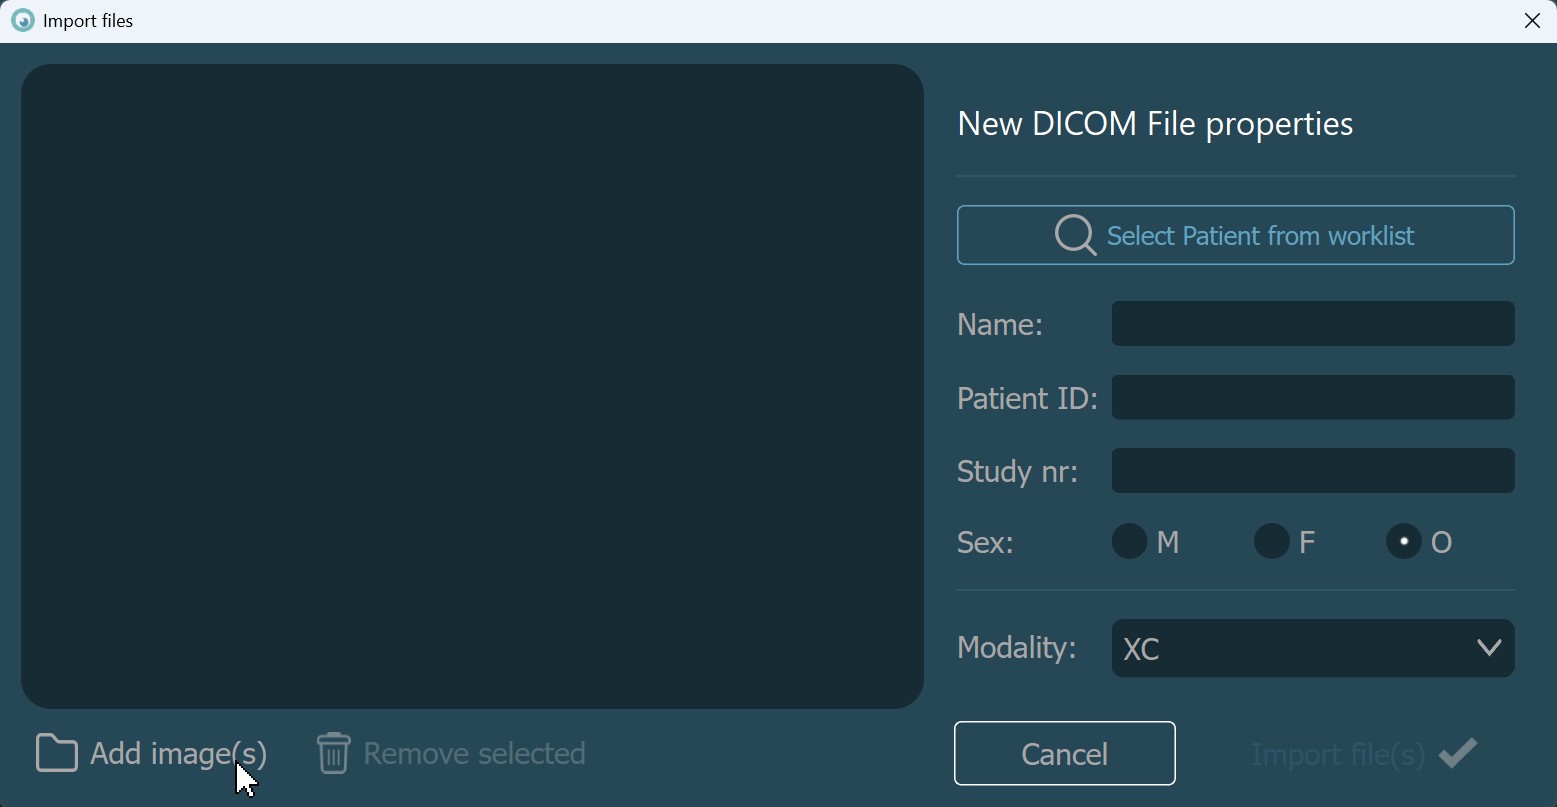
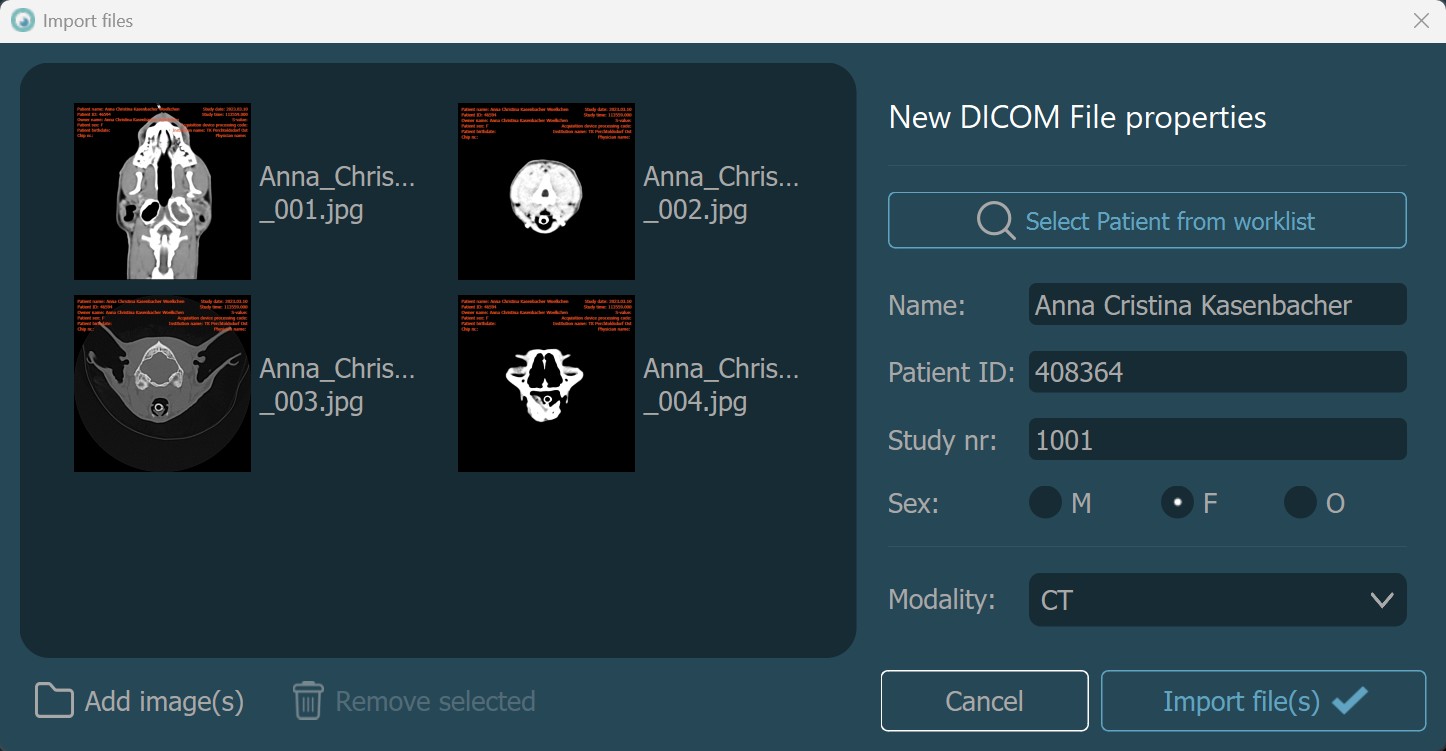
The VisioVIEW software opens a dedicated window to convert images into DICOM files and upload them to the server. To select the desired images, press the Add image(s) button of the import dialog.
The software opens the system’s file browser, allowing users to browse and select individual images. Once satisfied with the selection of images, press the Open button to add them to the import dialog.
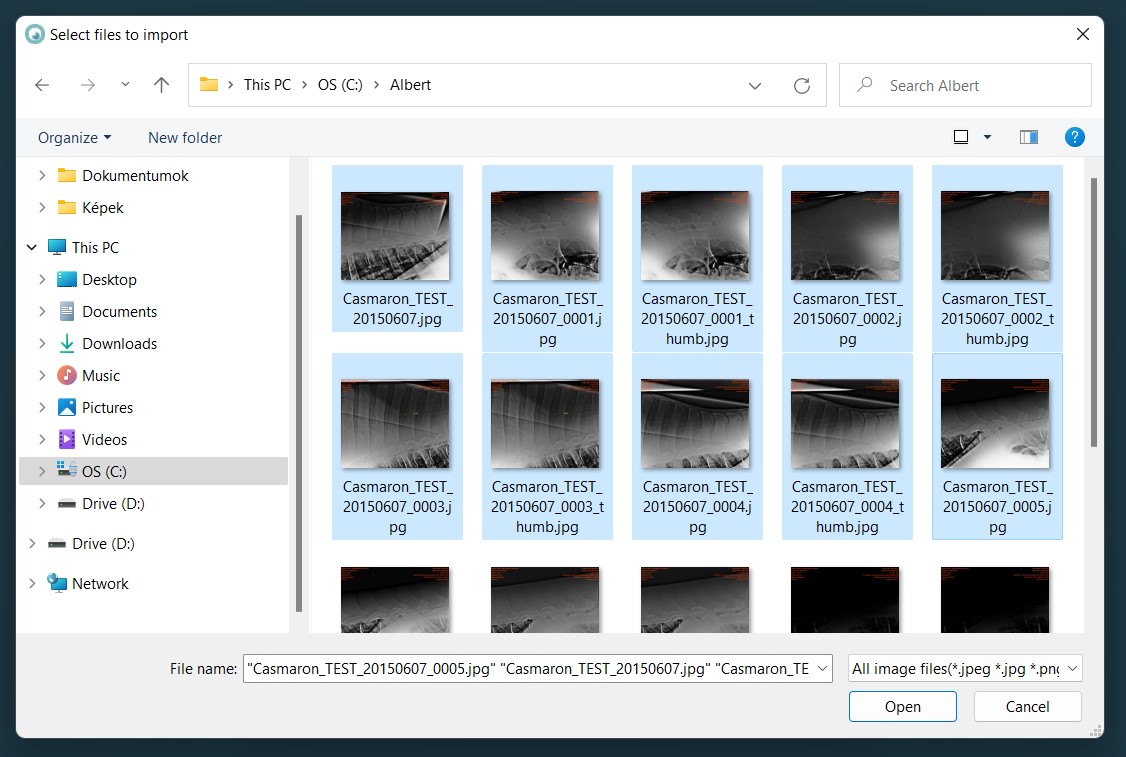
The selected images will be shown in the dialog’s left panel. To select more images, simply repeat the steps above. Additionally, images can be added by dragging them from the file browser and dropping them in the left panel. To remove images,
select them and press the Remove selected button.
Once satisfied with all of the chosen images, enter the required parameters on the dialog’s right side. The patient’s name is the only mandatory field, all other parameters can be omitted. The modality drop-down list can be modified in the import settings. The required parameters can also be specified by choosing a patient from the worklist.
To start the conversion of the images to DICOM files and upload them to the selected server, press Import file(s). Discard the selection and close the dialog by pressing Cancel.
Select Patient Information from Worklist
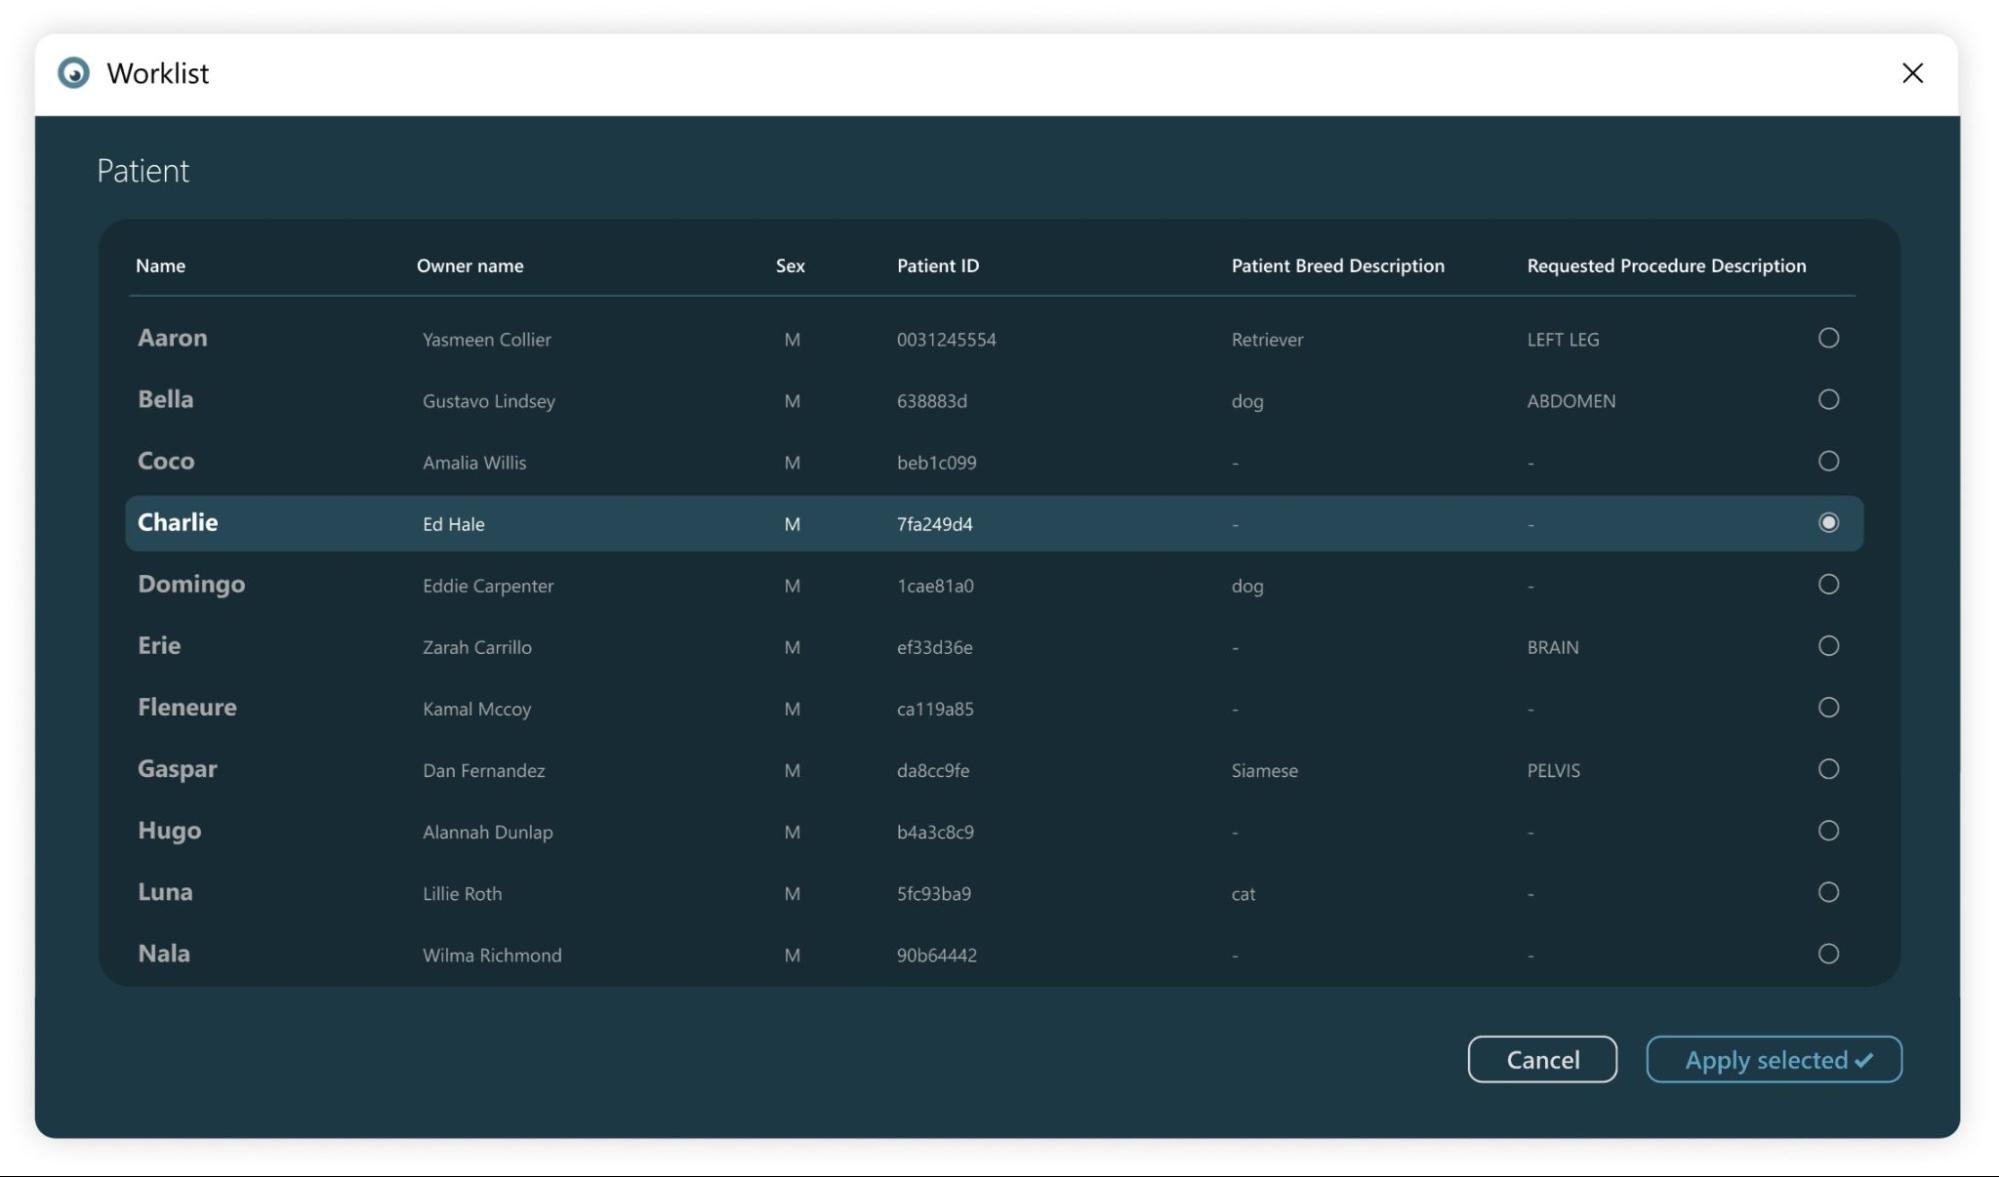
If the worklist was set up with the VisioVIEW software, users can use it to add the necessary patient data for the new imported images. Open the VisioVIEW worklist by pressing the Select Patient from Worklist button. Select a patient from the
worklist and press Apply selected to populate the parameters based on the selected patient.